A good warehouse layout is not a pretty floor plan. It is four decisions — how goods flow, which zones exist, how wide the aisles are and how big the racks are — plus an address for every shelf so the plan and the stock talk about the same places. For a small warehouse, getting those right matters more than any software, and it takes an afternoon rather than a consultant. This guide walks through them in order, with rule-of-thumb measurements, and ends with how to see the result in 3D without drawing it.
What a warehouse layout actually decides
Strip away the diagrams and a layout answers five questions:
- Where goods come in and go out, and the path between the two.
- Which zones you need — ambient, cold room, freezer, hazardous, bulky.
- How wide each aisle is, which depends on what drives down it.
- How big each rack is: bays across, levels up, how deep.
- How every position is named, so a picker can find it and a system can count it.
The first four are physical. The fifth is the one most small warehouses skip, and it is the one that decides whether the layout stays useful after the first busy month.
Start with flow, not with racks
Draw the route a pallet or a box takes: receiving, storage, picking, dispatch. The best layout is the one where that route is short and never crosses itself. Two shapes cover almost every small warehouse:
- U-shaped flow — receiving and dispatch on the same wall, storage in the middle. Good when you have one loading door. Fast movers go near the door.
- Straight-through flow — in at one end, out at the other. Good when you have doors on opposite sides and steady volume both ways.
Whichever you pick, put the products you touch most closest to dispatch and at waist height. That one rule saves more walking than any rack design.
Group by zone before you place a single rack
Zones come from the goods, not from the building. Anything that needs a temperature — chilled, frozen — has to sit inside its room, and that room is fixed. Lay those out first, then fit ambient storage around them. Bulky or awkward items (long lengths, drums) get their own area so they don’t block standard aisles.
It is worth naming zones explicitly. When a location carries its zone, you can filter by it, and anyone reading the plan sees “Cold room” rather than having to remember which aisles are inside the door.
Aisle width: decided by what drives down it
Aisle width is the most expensive number in the layout, because every extra centimetre is multiplied by every aisle. It is set by the vehicle, not by preference. As rough guides for planning — always confirm with your equipment supplier and your local safety rules:
| What moves in the aisle | Typical aisle width (approx.) |
|---|---|
| People with hand trolleys | 1.0–1.5 m |
| Manual pallet truck | 2.0–2.5 m |
| Reach truck | 2.7–3.2 m |
| Counterbalance forklift | 3.5–4.0 m |
If you only ever pick by hand and receive with a pallet truck, you do not need forklift aisles everywhere. Wide aisles where pallets go in, narrow aisles where people pick, is a common and cheap compromise.
Rack size: bays, levels and depth
Racks are measured in three directions, and each maps to something you will name later:
- Bays across. A standard pallet bay is roughly 2.7 m wide, which takes three euro pallets side by side. Shelving for boxes is narrower, around 1–1.2 m per bay.
- Levels up. Pallet levels are usually 1.4–2.0 m apart, depending on load height. Leave a little clearance above the tallest load; a level you cannot actually use is wasted height.
- Depth. About 1.1 m for pallet racking, 0.4–0.6 m for shelving.
Keep bays within one aisle the same width where you can. Uniform racks are easier to plan, easier to label, and easier to reorganise later.
Give every shelf an address
This is where a layout stops being a drawing and starts being a system. The standard addressing scheme mirrors the racks themselves: aisle, column (bay), height (level). Aisle A, bay 04, level 2 becomes the code A-04-2, and it means the same thing on the label, on the screen and in the picker’s head.
Three rules make the scheme hold up:
- Number in walking order. Bay 01 is the one nearest the start of the pick route.
- Pad the numbers. 01–10, not 1–10, so codes sort correctly.
- Never reuse a code. If a rack is removed, its addresses are retired, not recycled.
We go deeper on why coordinates beat free text in stockroom organization, and the warehouse locations feature shows how BasicInventory stores the three coordinates separately so the code is always written the same way.
Check the plan before you bolt anything down
A layout on paper hides its problems: an aisle that turns out to be a dead end, a cold room whose racks block the door, a fast mover parked at the far wall. The cheap way to catch those is to look at the plan in three dimensions, at real proportions, before anyone lifts a spanner.
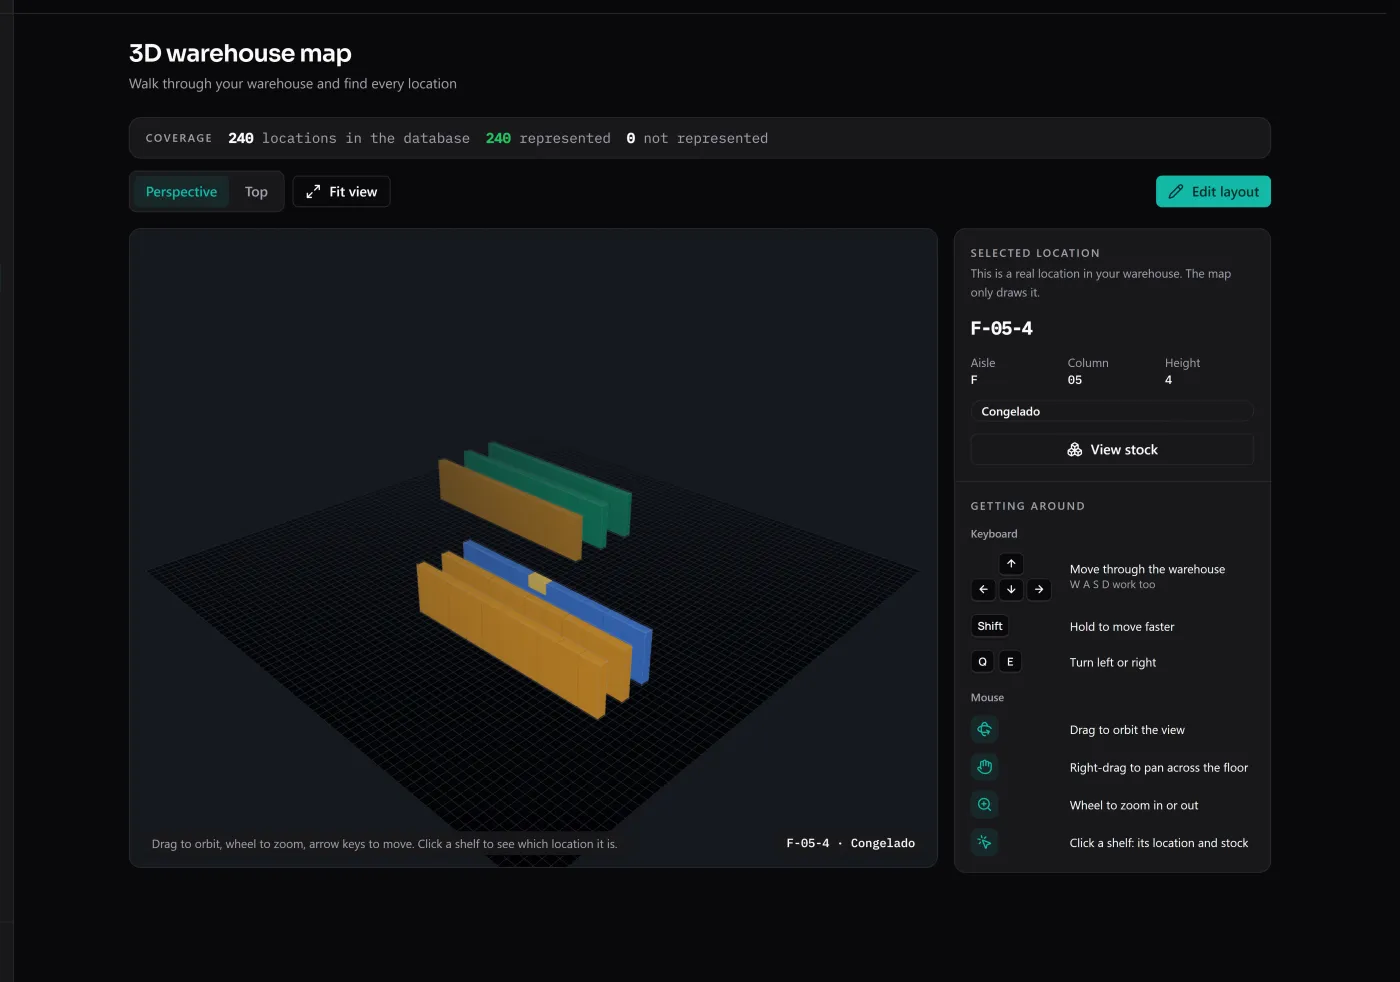
Most layout tools make you draw the warehouse first. If your locations already follow the aisle–column–height scheme, you can skip that step. The 3D warehouse map in BasicInventory reads your existing locations and draws them: one rack per aisle, one bay per column, one shelf per level, with zones grouped and coloured.
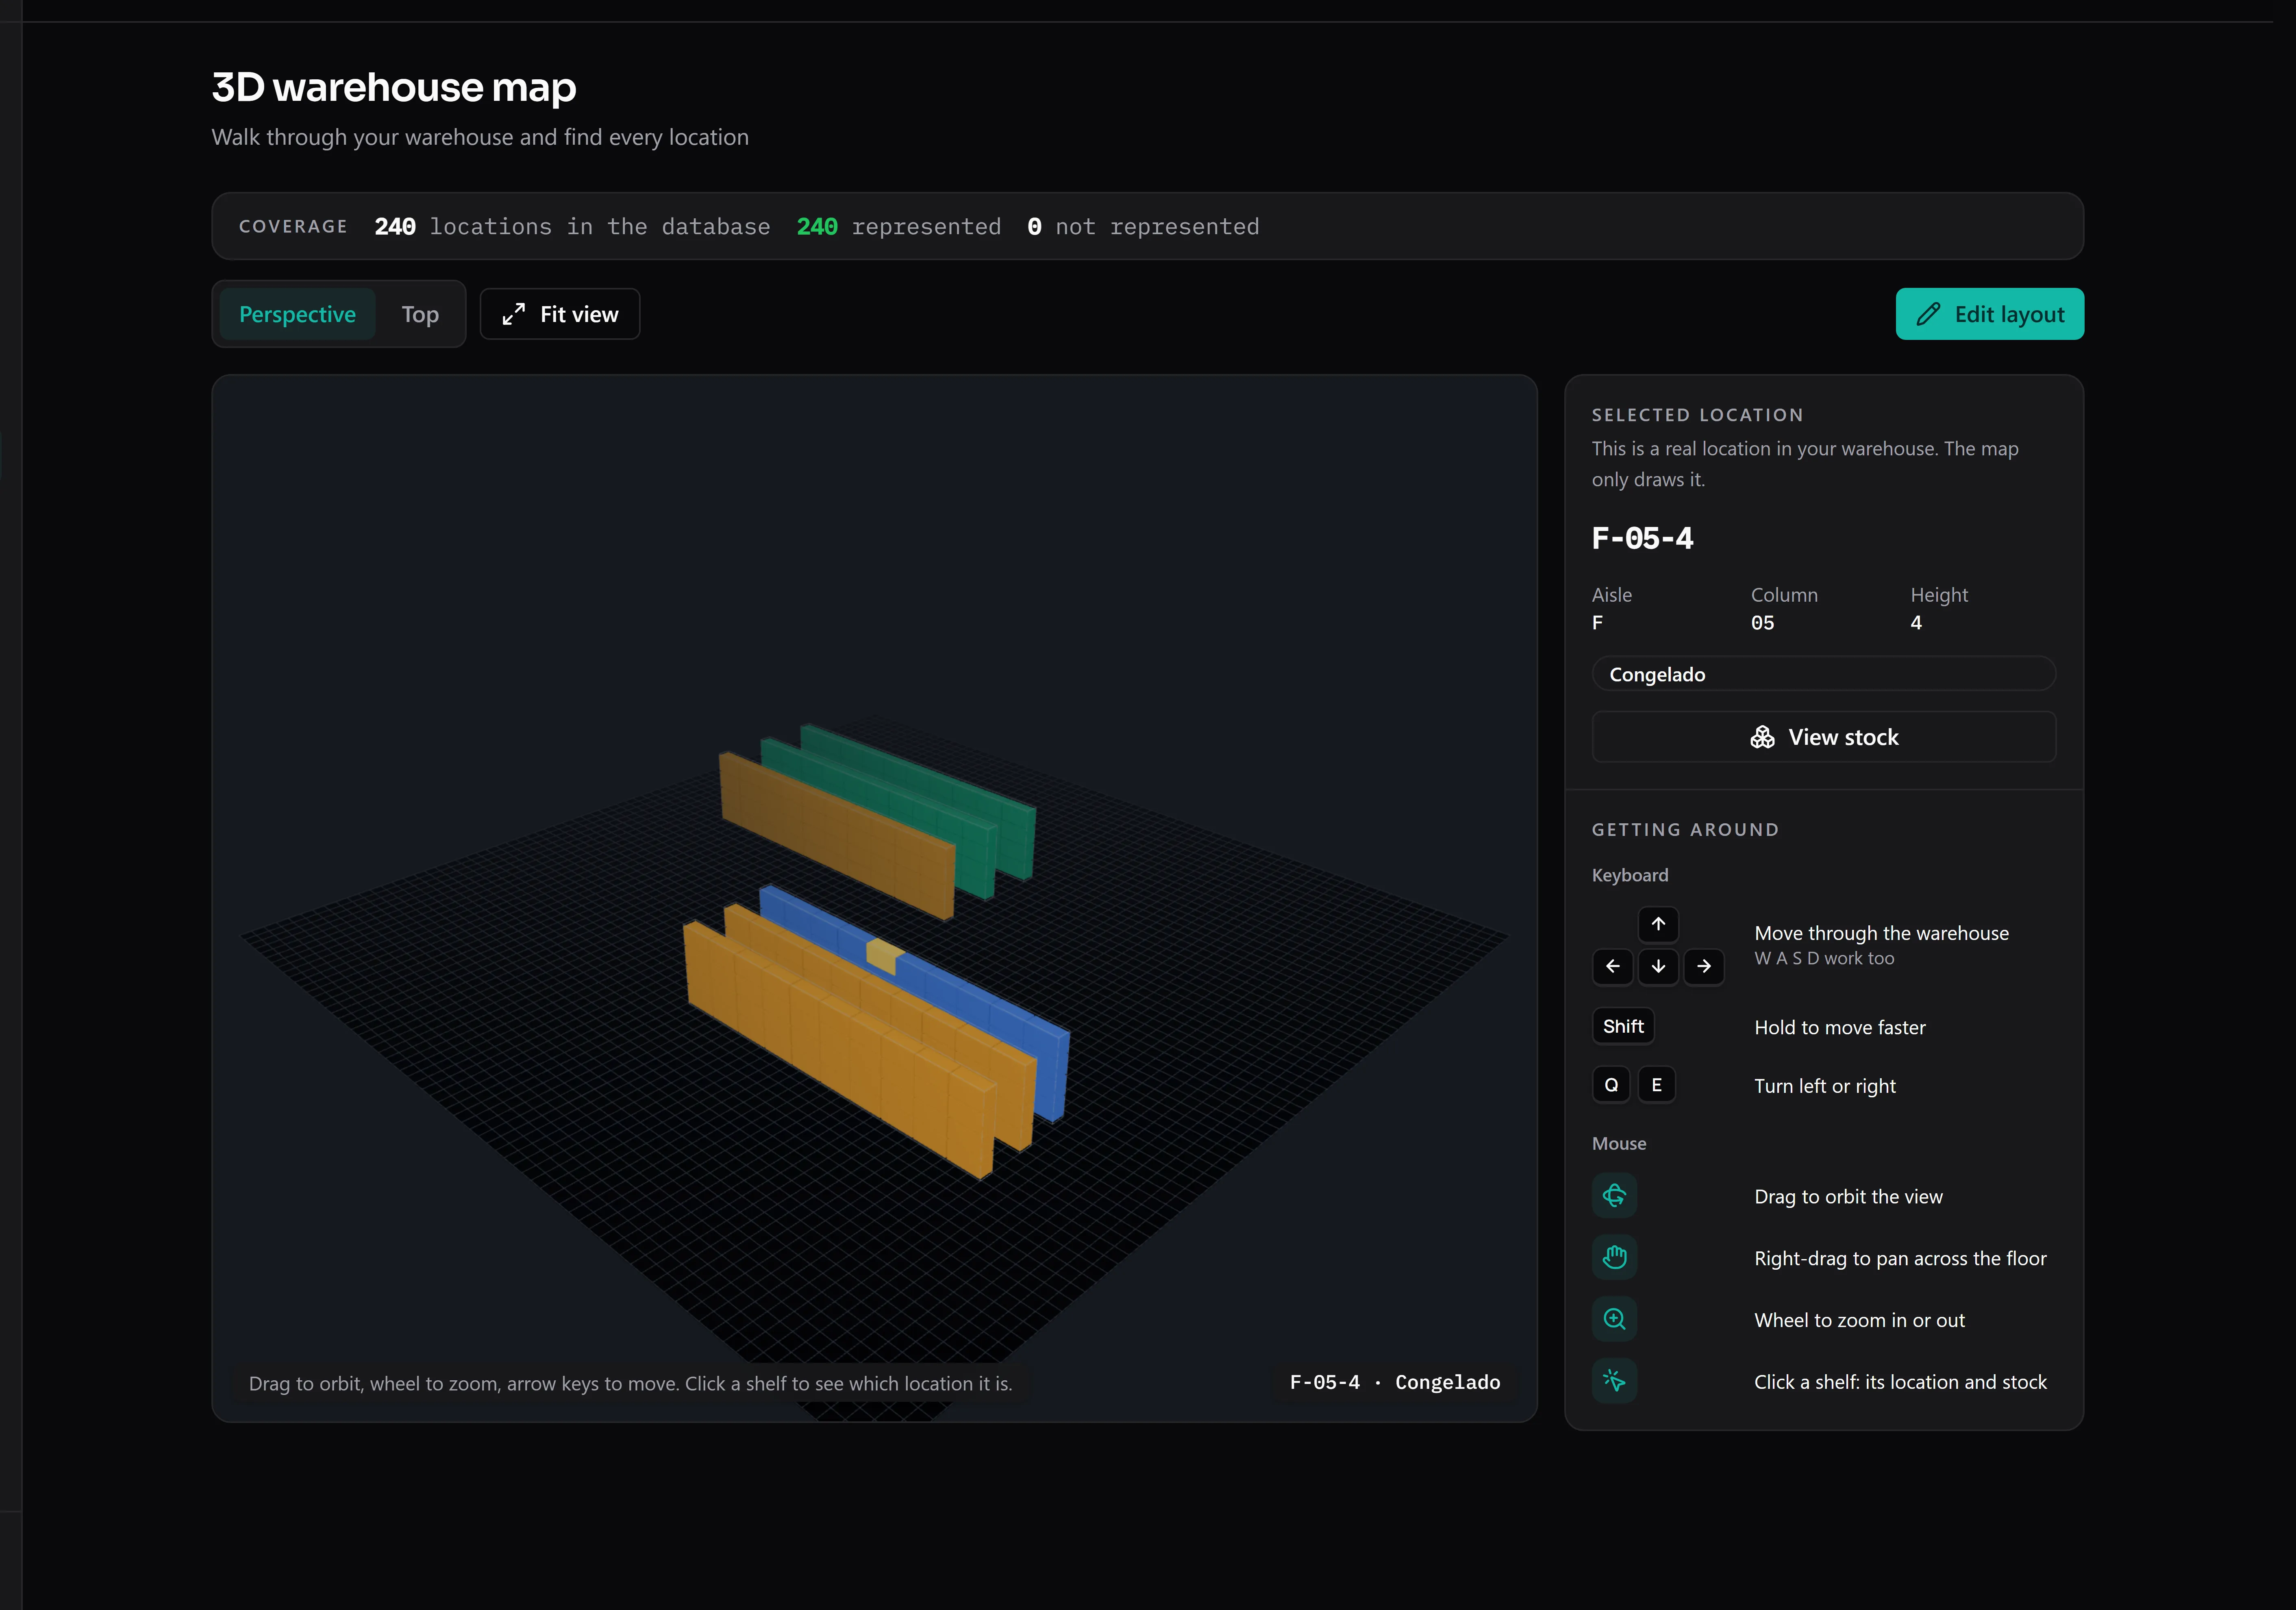
Racks drawn from the locations you already have — click any shelf to see which location it is.
It opens as a viewer: walk the aisles with the arrow keys (Shift to go faster on a big floor), orbit with the mouse, switch to the top-down plan to check clearances, and click any shelf to see which real location it is and open its stock. When the plan needs changing, Edit layout lets you adjust rather than draw: drag a rack, give it a quarter turn, and set the bay width, the depth, the level height and the gap between aisles with sliders in metres. If you would rather describe the change — “the cold-room aisles should sit apart and be wider” — the optional AI proposal suggests an arrangement and shows the list of changes before applying anything, using your own provider key.
Two honest limits. The map draws structure, not stock: shelves are coloured by zone, not by how full they are. And it is a configurator, not a CAD program — there are no walls, doors or dimensioned drawings to export. It is for seeing and arranging the warehouse you have, quickly.
A short checklist
- Flow drawn, receiving to dispatch, with no crossings.
- Zones placed first; ambient storage fitted around them.
- Aisle widths chosen per vehicle, not per habit.
- Racks uniform within each aisle; levels with real clearance.
- Every position addressed as aisle–column–height, padded and in walking order.
- The plan checked in 3D before anything is fixed to the floor.
Try it on a sample warehouse
The demo is the whole application in your browser, with a sample warehouse already loaded — open the 3D map and the racks are there. No install, no account. If it fits how you work, the application is a single payment, not a subscription.